Netgear Nighthawk X8 R8500 AC5300 router supports the next-generation wireless standard Wi-Fi 6. This top-of-the-line router delivers fast wireless performance while featuring excellent data speeds. Powered by a 1.4GHz dual-core processor, the Nighthawk AC5300 boosts overall network performance. This device delivers combined Wi-Fi speeds up to 5.3Gbps for uninterrupted streaming.
The smart setup wizard lets you install the R8500 Nighthawk router and configure its wireless settings. To access the quick setup wizard, you have to complete the Netgear Nighthawk R8500 login process. To know how to log into the Nighthawk router and update its firmware, check out this short article.

Netgear Nighthawk R8500 Login Instructions:
Step 1: Initial Setup
- Position your router within reach of your wireless devices as well as a power outlet.
- Connect an Ethernet cable from the modem to the internet port on the Netgear wireless router.
- Plug the modem in the power source and turn the modem on.
- Now, connect the power adapter to the router and plug in the adapter in an electrical outlet.
- Turn on the Nighthawk R8500 and wait until the power LED on the router starts to blink.
Step 2: Connect to the Network
- After you complete the initial setup, connect any wireless device such as a PC, laptop, etc. to the Netgear router’s network.
- Try using a wired connection to connect to the router’s network. The Ethernet connection is more reliable and secure rather than a wireless connection.
- Use a computer system with a full browser to start the login process. Make sure your PC has an active internet connection.
- Now, connect the Ethernet cable from the computer’s Ethernet port to the LAN port on the Nighthawk router.
Step 3: Log into the Nighthawk r8500 setup page
- Launch a browser on the PC and visit http://www.routerlogin.net in the browser’s address bar.
- You’ll be redirected to a login screen where you would be asked to enter the router’s login details.
- Put the default username and password of your Netgear AC5300 router and click the login button.
- Now, it will be redirected to the Netgear web-interface where you can configure the internet and security settings of your router.
- Also, you can manage the overall network performance by customizing the Nighthawk’s advanced features.
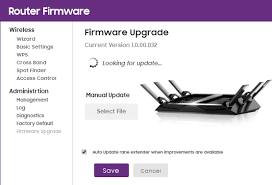
Procedure of the Netgear firmware update
It is essential to update the Nighthawk r8500 firmware as the latest firmware enhances the performance and fix previous bugs. Here are easy instructions to update the firmware of your Nighthawk R8500:
- First of all, access the basic web-management page of the Netgear wifi router with the above instructions.
- Now, navigate through the “Advanced” settings of the router.
- Then, click the “Administration” tab, choose the “Firmware Update” and continue to the next step.
- Now, click the “Check” button to check if any new firmware is available.
- Click on the “Yes” option if you find any latest update available.
- The Nighthawk router automatically starts the update process.
- When the firmware update is complete, the router reboots itself.
Summary:
This is all about the Nighthawk r8500 firmware and login process. We hope this article helped you. In case, you face any kind of issues during the whole process then you can take help from our Router Login Support team. If you have more queries like this, contact us at our toll-free no.
